
|
  
|
||||||||||||||||||||||||||||
|
||||||||||||||||||||||||||||
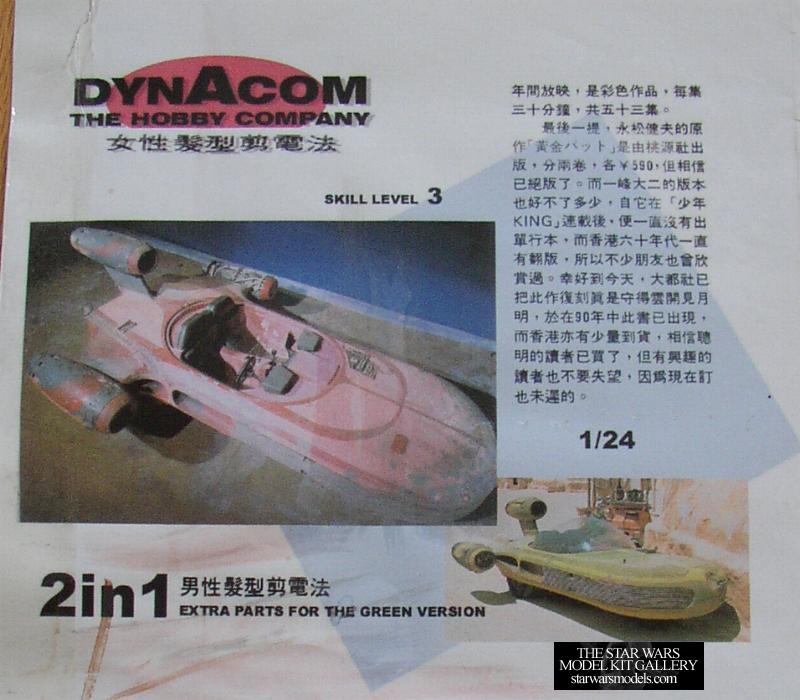
| This is a unique kit that looks really good. Great subject and awesome sculpting. This kit is very accurate in its sculpting down to the last scratch. They actually sculpted the damage marks into the body as seen in the movie. Assembly on this kit was tricky. Aligning the engines was tough. There were no guide marks, pins, tabs whatever. You just had to position the round pieces on the flat wings and glue them down. You had to be very careful to position them perfectly. They actually gave you an extra side engine that wasn't opened up like Luke's. This means that you can build Luke's, or just a stock Landspeeder like the one seen in Episode One in Mos Espa. All the rest of the assembly went ok. Just a bunch of small parts and a clear styrene windscreen that had to be trimmed down from the vacuform sheet. Painting was the hardest part as Luke's Landspeeder has some totally weird colors. If you ask me, they look pretty pink. Explain to me why Uncle Owen won't let Luke go do some manly stuff with power converters down at Tosche Station, but he'll let Luke paint his speeder pink. I dunno. I used some references from the Art of A New Hope and Behind the Magic. You really have to be careful because every side is different and has its own unique markings/weathering. The best I can suggest is just mixing colors until you find the right ones. As for weathering, I used a variety of techniques and paints. I dry brushed some blacks around the engines and intakes and then some browns around the front hood area. I put a lot of silver where there were paint chips, dents and scratches. I washed, airbrushed and dry brushed various colors across the rest of the speeder. I got this kit online for $65. |
||||||||||||||||||||||||||||
| Other Variations: |
||||||||||||||||||||||||||||
| None |
||||||||||||||||||||||||||||
|
Copyright © 2001-2016 starwarsmodels.com.
No portion of this site is to be reproduced in any way, shape or form without
my permission beforehand. |
||||||||||||||||||||||||||||


