 |
  
|
||
| Weathering/Detailing Battle Damage (Physical) - Battle Damage (Visual) - Chipped Paint - Dry Brushing - Wash - Scribing  Battle damage is one of the most important things in Star Wars modeling. Most of it is merely visual, just a dark streak or smear. Some of it, however, is physical. A dent, ding, scar or chunk. This is most evident on the body of the Millennium Falcon. The best way to do this is with something hot to melt the plastic. I suggest an old soldering iron. Making damage on Star Wars kits isn't like on most other types of modeling. Most people would use aircraft modeling techniques but it really doesn't work. In aircraft the sheet metal is extremely thing. In Star Wars they have thick bulkheads surrounding the ships. There is no such thing as thin little sheet metal when talking about interstellar warships. With that said, the damage has to have some substance to it. It has to look thick. The ionized gas bolts of the turbolasers and other weaponry melt the armor on Star Wars ships. That is why I suggest melting the plastic with a soldering iron. It is basically the exact same thing. Start by practicing a LOT on scrap plastic. It takes some practice to get it right. To do it, stick the soldering iron right into the plastic and as it melts, push it outward in the direction the blast would go. Make small ridges off it around the damaged area. It should look somewhat like an impact crater. Be careful not to push too far because you can go right through the plastic. If that happens and that is not what you were intending to do, than you have to place a piece of sheet styrene underneath to fill the hole. That's pretty much it.

Visual battle damage is the most common type of damage shown on Star wars ships. These can be anything from dark streaks to subtle weather marks. The best way to make the dark kind is to use an airbrush. You can spray a mark in the direction that it would normally travel. It is important to not use black paint when doing this. I used to use black and it just ended up looking cartoonish. If you want an accurate look as compared to the original studio models, use a dark gray or just something that looks dirty. Also, when weathering an entire model using this technique, make sure that you vary the color as you go along. If you use one color over the whole model it will not look right. To make the lighter kind of damage you have a few choices. You can airbrush it, you can try the dry brush or wash technique described below, or you can use chalk. The chalk technique is attained by rubbing some dark artist chalks on sandpaper until you have a nice pile of dust. Then, take a very finely haired brush and run it through the chalk. It sometimes helps if the brush is just barely moist. This helps the chalk stick a little better. With the chalk on the brush, swipe it over the model like you would dry brush. Swipe in the direction of the mark. It takes a few tries to get it up to full color. Be careful, as soon as you touch it, it will disappear! If you are going to use chalks, do them last right before you seal the model with an overcoat. 
This is one of my favorite techniques. There are
two separate techniques I use for this. The first is for when there is
not a ton of small detail that needs to show through the paint. I used
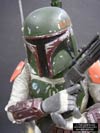
this extensively on the 1/6, 1/12 and 1/15 Boba Fett. What I do is first
decide what parts need to be chipped. I spray these parts with whatever
color I want to show through. This is usually silver because most things
are metal. This has to be done with a very hard enamel. I use Testors
silver in the aerosol can. This has always worked for me without fail.
I let that dry for a long time. After it has dried I paint my topcoat
on top of that. This has to be done in a soft acrylic paint. I use the
kinds that are used for Folk and Tole painting, brands like Delta Ceramcoat,
Apple Barrel etc. They are extremely cheap, come in almost unlimited colors
and can be found anywhere. This has to be painted by hand in several coats.
It will be thick so that is why I suggest only using the technique on
things that don't have a ton of detail. Let this acrylic dry and then
take an X-ACTO to it randomly. I suggest softly sticking the tip of the
blade into the soft acrylic paint and then pulling it away from the part.
The top color should come off to reveal the silver underneath. This takes
some practice to get right. 
This is another great weathering technique that I use all of the time. Washing refers to diluting paint to an almost water consistency. You basically want it to look and run like dirty water or thinner. With this, you can run it into the panel lines or detail areas of a piece to help bring them out or make weather spots. This is done through several different methods. If you want an overall dirty look, liberally apply the wash all over the model. It will pool in some areas and flow into others. This should give you an overall grungy dirty look. If you want it just in the detail areas, first coat your model with a Gloss spray. The apply the wash only to the detail areas like panel lines. It will automatically flow into them because of the gloss finish. Once it has dried the details will stand out and you can dull coat the model if you want. You can also use wash to specifically detail certain areas. Say there is an oil leak or some kind of other outlet that gives off nasty stuff. You can place a good drop of the wash in the area where it exits and let it run in the natural direction or you can taper it with your brush. I sometimes like to place the drop and smear it down with my finger. This looks especially good on the side of the AT-AT. This is a basic technique that can be used to engrave things into the surface of a kit like details or panel lines. Often times plastic kits will have unrealistic panel lines or missing panel lines. A scribing tool, much like an Awl or dentist pick, can be used to scribe these in. Often times resin kits will lose some of the detail in the panel lines through the molding process and this technique can revive what is left. The most important thing to remember is to try to keep the lines as straight as possible. If they aren't straight they look terrible. The best way to keep them straight is to use a template. This are sold by companies like Verlinden and are small pieces of sheet metal with guides to run the tool through. If you can not find or afford these you can also use labeling tape. You know those little doohickeys where they have a hard plastic label with a sticky backing and you select each letter and punch it into the tape? Well the plastic tape from those make great guides. Just buy the refill rolls. Remove the sticky backing and place the edge along the line you want to scribe. The scribing tool will not go through the plastic and should make a nice straight edge. |
||
|
Copyright © 2001-2016 starwarsmodels.com.
No portion of this site is to be reproduced in any way, shape or form without
my permission beforehand. |
||