
|
  
|
||||||||||||||||||||||||||||
|
||||||||||||||||||||||||||||
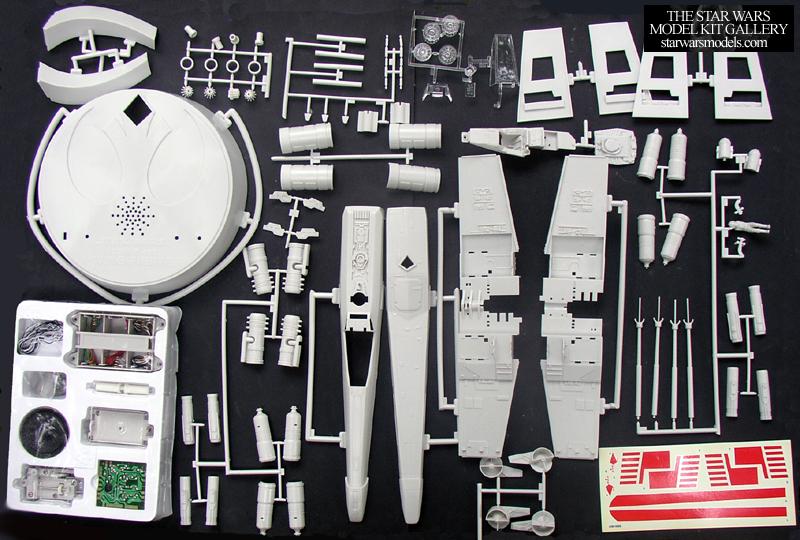
| Like a few of my other X-wings, you will find that there are a few different versions here. One built stock as Red 3, another heavily modified as Red 5, and another even more heavily modified as Red 3 from ROTJ. This kit had a lot of promise but suffered from soft detail, inaccuracies and just a general lack of quality. The only plus to the kit is the nicely detailed cockpit and pilot figure. The first kit you see is built stock. No changes were made to the model or the electronics. The lights and sounds work, but the motors have some trouble. They provide you with some tiny lamps to light the engines and cockpit, motors to open and close the wings and canopy, and the base has some sound effects and voice clips from the movies. The whole idea is neat and with some work can be something very nice. For my second X-wing, I went all out. I built this for a customer and he wanted the works, so that is what I gave him. I started by accurizing the model itself. I rebuilt the wing interiors, removed inaccurate detail, re scribed and added just about every single panel line, added some more detail, and took some more away until I had a pretty good version of the original X-wing. Next, I got rid of all of the kit electronics and motors. I then rigged up 4 ultra bright red LEDs in the engine. I then put one in the cockpit along with a green LED and a blinking red LED. These were hooked to fiber optic cables inserted into dozens of holes in the cockpit to simulate the instrument panels. I hooked the whole thing up to two AA batteries that fit inside the rear fuselage. The circuit operates on a switch that is located beneath R2-D2. Press him down and the light come on. Press him again and the lights go off. For painting I started by gathering a lot of resources. If you read my Fine Molds X-wing write-up, than you know what I am talking about. Painting is critical to make it look good. I started with a base coat of Model Master Camouflage Gray. I then added all of the detail panels and markings in the appropriate colors. No decals were used. Everything was airbrushed. It was just about all custom mixes. Some straight colors were Floquil Caboose Red, Neutral Gray, Gunship Gray, Radome Tan, Rust, Light Sea Gray etc etc. It was a lot of work! I then did the battle damage. This was done through a series of airbrushes, washes and hand painting of streaks, marks and dings. I tried to replicate every last scratch seen in my reference photos and I got just about all of them. After the ship itself was done I moved on to the base. I started with a 16x20 wooden base and sprayed it with Gloss Black. I then took 4, count 'em 4, AMT/ERTL Imperial TIE Fighter kits and removed the Death Star panels from them. I chopped off the beveled edges, cut them up into pieces to patch together, added a ton of extra details and glued them to the base. They were sprayed with a Gray Primer and then some various darker shades of gray and black. I drilled a hole into the base, inserted a clear acrylic rod. Mounted the X-wing on it and it was done. The third X-wing I did was built to replicate the massive X-wing model used for the go-motion scenes in Return Of The Jedi. This model can be seen in the traveling Star Wars exhibit that has made its way around the world. This build was the most involved accurizing I have done yet on a kit. After building the Red 5 version, I found even more things to accurize such as the engines, intakes, rear deck, more fuselage details, more wing interior details. Basically every piece in the kit was modified or rebuilt entirely from scratch. I used the studio scale Captain Cardboard kit as my main reference for physical detail. After detailing was done, I painted it using the same colors as the Red 5 X-wing. This one was weathered mostly with pastels, chalks and charcoal. I've always liked how realistic this method looks, so I wanted to see if I could do it here. I think the weathering came out really nice. The electronics are a bit different in this one. Like the Red 5, I got rid of the original stuff and added my own. The difference is in what I added. All of the lights run off of 2 C cell batteries in the base. They power 4 super-ultrabright red LEDs, 1 ultra bright red LED, 1 ultra bright blue LED, 1 ultra bright white LED, 1 green LED, and one blinking red LED. Fiber optics were used to light the cockpit as well as R2 droid. I'm really happy with how this one turned out. Unfortunately it was also built for someone else so I hated to see it go. |
||||||||||||||||||||||||||||
| Other Variations: |
||||||||||||||||||||||||||||
| None |
||||||||||||||||||||||||||||
|
Copyright © 2001-2016 starwarsmodels.com.
No portion of this site is to be reproduced in any way, shape or form without
my permission beforehand. |
||||||||||||||||||||||||||||


