|
  
|
|||||||||||||||||||||||||||||||||||||||||||||||||||||||||||||||||||||||||||||
| Construction
Cleaning Parts - Stripping Paint - Trimming Plastic - Trimming Resin - Trimming Vinyl - Sanding - Gluing - Glue Brand Comparison - Filling Seams & Surface Imperfections 
Before assembling any model, you should always clean the parts. I almost never do this because I am lazy, but it can really make a difference in the way your paint sticks to the model. When a model is made by the manufacturer, there are usually some type of chemicals involved in the process that get on the parts. This is especially true for resin models as they are often coated in a oily mold release agent. Paint sticks to this and not to the model. A good way to clean chemicals from your model is with simple household cleaners. I highly recommend the cleaner Simple Green. You can find this anywhere for around $4 a bottle. It usually comes in a spray bottle like Windex or Fantastik. I have found Simple Green to work the best out of any. It is also really safe to use, unlike most modeling materials. To clean parts, fill up a basin large enough to hold them all in. Do not use hot water as this can damage or warp parts. As it is filling, spray in some Simple Green. Do this until there are a good amount of suds in the water. Submerse your parts in the water. If you are doing this in a sink, be careful to make sure the drain is securely plugged or else you will lose small loose parts. Swish the parts around in the water nice and good. If you feel that it is necessary, add some more Simple Green. You can't really use enough. It washes off with no problem so don't worry about overdoing it. Let the parts soak in the solution for a while. I usually go do something else for a while. I let them soak for a couple of hours of just a few minutes. Whatever you have the patience for. The amount of time you let the parts soak also depends on how oily the pieces are. More oil means more soaking time. You can also scrub the less fragile parts with anything from an old toothbrush (or the brush of someone you don't like) to a soft sponge. This helps speed up the cleaning process and remove any stubborn dirt. Regardless, let them sit for at least a little while. By the time you come back to the parts, all of the suds will be gone and the water will have a slight green tint to it. If you are cleaning in a sink, then start the water running again. If you are using a tub, basin, etc, move it over to a sink and start the water running. Be sure to plug the sink up. Pull out each piece or part tree individually and wash it off under the water. Simple Green washes off very easily so it should just come right off. Place the parts out to dry on a paper towel and you will be all set. Feel the parts, they feel a lot nicer than they did before!
I'm never fully satisfied with a model, and a lot of
times I like to repaint them. To strip paint, whether old or new, involves
dangerous chemicals so be careful. I usually like to disassemble a model
if possible into a few main assemblies before I remove the paint. This
can be very tricky so only do it if you absolutely need to. Once this
is done, throw all of the parts inside of a Ziploc bag if they can fit.
If not, I'll explain what to do later.
Trimming Plastic - This is a very basic technique that is one of the first things that you do when assembling a model. After you take the part off of the tree there can be a little extra plastic near the connection point or some "flash" around the edge of the part. Flash is a very thin, pretty much translucent, layer of plastic that leaked out of the mold. If there is a lot of this you can simply slice it off with a sharp X-ACTO blade. Be careful not to get too close to the actual part. If you hit the piece you can make a nice chunk in the piece. When the flash or remains of the plastic tab is close to the actual piece, just use a little sandpaper until it is down. Always remember to cut the pieces off of the tree and not twist them. I made this mistake all too often because it is so easy and tempting. Just take the extra second to pick up an X-ACTO or a sprue cutter. Resin is harder to trim than most materials because it is often very thick and very hard. If the pieces are small then they may just have a thin little layer around them very similar to plastic flash. This can be sliced off with an X-ACTO and then sanded down smooth. Unfortunately most of the time there are large chunks of resin that need to be trimmed. What you need here is a razor saw and then some sandpaper or a Dremel sanding wheel. Use the razor saw to cut the majority of the resin chunk off. Get as close as you can to the piece without hitting it. After that, sand it down until it is smooth. Although it feels hard and heavy, resin can be damaged just as easily as plastic so be careful! Trimming vinyl is a pain in the butt! Vinyl can not be easily cut with an X-ACTO under normal circumstances. Trust me, don't try it! Read my review on the 1/4 Luke Skywalker to find out what I am talking about. Vinyl must be heated before the extra pieces can be trimmed off. You can use anything that blows heat for this. A common tool to use is a hairdryer. But I would suggest a paint stripper heat gun. It is quieter and gets hotter faster. Just hold the piece as far away from the area to be heated as possible (it gets hot!) and warm it up. Just make sure you rotate the piece if possible to get a nice even heat coverage. It gives off a lovely smell when heated! be very careful not to overdo it. The vinyl can actually singe and even burn if heated too much. Once it is warmed quickly get your X-ACTO and start slicing off what needs to be removed. You'll find that if you heat it too much it will be difficult to cut because there is no resistance at all and the blade just flies and it is hard to control. I like to heat it to a certain point where there is enough resistance that I can hold the piece without crushing it and still maintain control. Another method is soaking the parts in hot water to soften them up. I tend to use this to restore parts to their original shape rather than for trimming. It's a little messy with all of the water and you really don't need to heat the entire piece. That's why I use the heat gun as it is more specific.
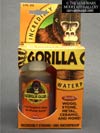
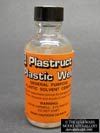
Sanding is necessary with almost every model you build. Whether you do it to make a part fit better, to remove excess plastic or flash, or to sand a puttied seam smooth, you have to do it carefully. Too much sanding can remove small details or gouge the plastic. Don't use anything less than 220 grit. Any rougher than that and you really risk scratching the plastic. It is also best to wet sand whenever possible. This means sanding the part under a little running water. This serves to flush away debris and ensures a smoother, cleaner sanding job. You'll be amazed how smooth you can wet sand something. Just make sure your sandpaper is meant for wet sanding. I would also recommend using a sanding block for general planar sanding (it's not for complex curves or details). This can be just a block of wood with the sandpaper attached, or a nice rubber one that is easier to hold and secures the paper in place with little spikes. A sanding block lets you sand easier by giving you something to grab onto and also lets you sand cleaner, straighter and smoother. Gluing is another necessity when building models. If you don't, your kit will fall apart! Duh. When it comes to gluing, less is more. Use the glue sparingly. You will find that less glue will actually bond faster and stronger than more glue. Too much glue and it will leak out of the seams or, depending on the type, melt the plastic! If the glue you are using doesn't cure instantly, you should clamp the parts and let them dry for the full period recommended. Too many times have I picked up a part before it was cured, only to have it fall apart on me. Very frustrating. I recommend, for whatever type of glue you use, to get a precision applicator for it. There is nothing worse than getting glue where you don't want it. That brings me to my next point. There are many different types of glue. Each one is meant for a specific purpose. It can be confusing what type of glue to use, so that's why I recommend you read the next section. Ok, so you've trimmed all those piece and parts and cleaned them up all nice. Now I bet you want to glue them together, huh? That would probably help. The key to gluing is being neat, and applying it sparingly. Too much glue will ruin a model by either leaking out of the seams, or melting the plastic. It is also critical that you choose the right type of glue for the right application. There are a lot of different types of glue, all with different uses and properties. I will try to explain the differences in the handy comparison table below.
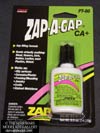
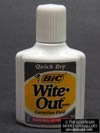
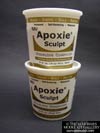
Filling Seams & Surface Imperfections- Depending on the type of model you build, how you build it, and the quality of the kit, you may have to do some filling. This involves using some form of putty. There are many different products used for filling gaps and surface imperfections because there are so many different types of problems you'll need them for. Large gaps, small gaps, air bubbles, surface texture, etc. The most basic problem you will run into is your standard, run of the mill gap between parts. This is usually pretty small, but will show when painted over. You can use an assortment of products on general gaps; Squadron putty, Bondo, Gap Filling Super Glue (ZapAGap), even Wite-Out if the gap is small enough. All you have to do to fill a seam is spread a thin layer of the filler over the gap using a trowel, piece of plastic, X-ACTO blade, even your finger, let it dry, and then sand smooth. To ensure a clean application, place two strips of masking tape just outside the seam before you apply the putty to prevent excess putty from spreading on areas of the model where it is not needed. Squadron and Testors seam filling putty can also be smoothed out using a Q-tip dipped in acetone nail polish remover. Just be careful around bare styrene as it will eat away at it if you aren't careful. Bubbles created in casting a resin kit can also be filled with the above method. Minor surface scratches, nicks or dents can be easily filled with some Wite-Out. Just spread the liquid (I recommend the foam brush variety) over the affected area and let it dry. In a few minutes you'll be able to sand it smooth and the surface imperfection will be gone! Similar products like the Mr. Surfacer line from Gunze Sangyo can also be used. These are more of a thinned down seam filling putty. Larger gaps, or areas that need to be rebuilt must be filled with something a bit more solid. I recommend the use of Aves Apoxie Sculpt. This is a two part epoxy that you mix together to form a nice, firm putty that you can work in unlimited ways. It is water based, non-toxic and air dries. You can't ask for more than that! To use it, just take equal parts of both A and B and mix them thoroughly by kneading. Once they are mixed, you can take the putty and work it into the area that needs attention. Keeping your fingers moist will help keep the putty from sticking to you. You can also smooth it down by moistening your finger and running it over the surface like you would with clay. You can even sculpt details into the putty if the seam is on an area that needs detail. In this respect, it is perfect for filling seams on vinyl kits of monsters, animals, etc. Aves is really a spectacular product and I use it all the time for large areas. It dries in about 24 hours very hard and firm.
|
|||||||||||||||||||||||||||||||||||||||||||||||||||||||||||||||||||||||||||||
|
Copyright © 2001-2016 starwarsmodels.com.
No portion of this site is to be reproduced in any way, shape or form without
my permission beforehand. |
|||||||||||||||||||||||||||||||||||||||||||||||||||||||||||||||||||||||||||||